TOC
- Introduction
- Required supplies
- Preparing Coreboot build environment
- Accessing the BIOS chip
- Dumping the stock BIOS
- Configuring and building Coreboot
- Flashing Coreboot
- Links
Introduction
Coreboot is an open-source project aimed at replacing the proprietary BIOS or UEFI firmware commonly found in most computers. It provides a lightweight and flexible alternative that focuses on fast boot times, security, and customizability. Unlike traditional BIOS or UEFI, Coreboot initializes only the essential hardware components, which not only speeds up the boot process but also allows for greater control and transparency.
Required supplies
- Target Device: Lenovo ThinkPad T420
- Disassembly tools to open the laptop.
- Isopropyl alcohol and Thermal paste (optional, if you decide to replace the old thermal paste when reassembling).
- Coreboot Build Environment: Linux Computer
- A computer running a Linux operating system to compile and build Coreboot.
- SPI Flasher
- A device to write the Coreboot firmware to the T420’s BIOS chip.
- Options include CH341A programmer, Bus Pirate, or a Raspberry Pi configured as an SPI flasher.
Preparing Coreboot build environment
Start by installing the build dependencies:
sudo pacman -S base-devel curl git gcc-ada ncurses zlibClone the Coreboot repository and initialize the submodules:
git clone https://review.coreboot.org/coreboot
cd coreboot
git submodule update --recursive --init
Create directories for binary blobs:
mkdir -p ./3rdparty/blobs/mainboard/lenovo/t420Build the ifdtool:
cd ./utils/ifdtool
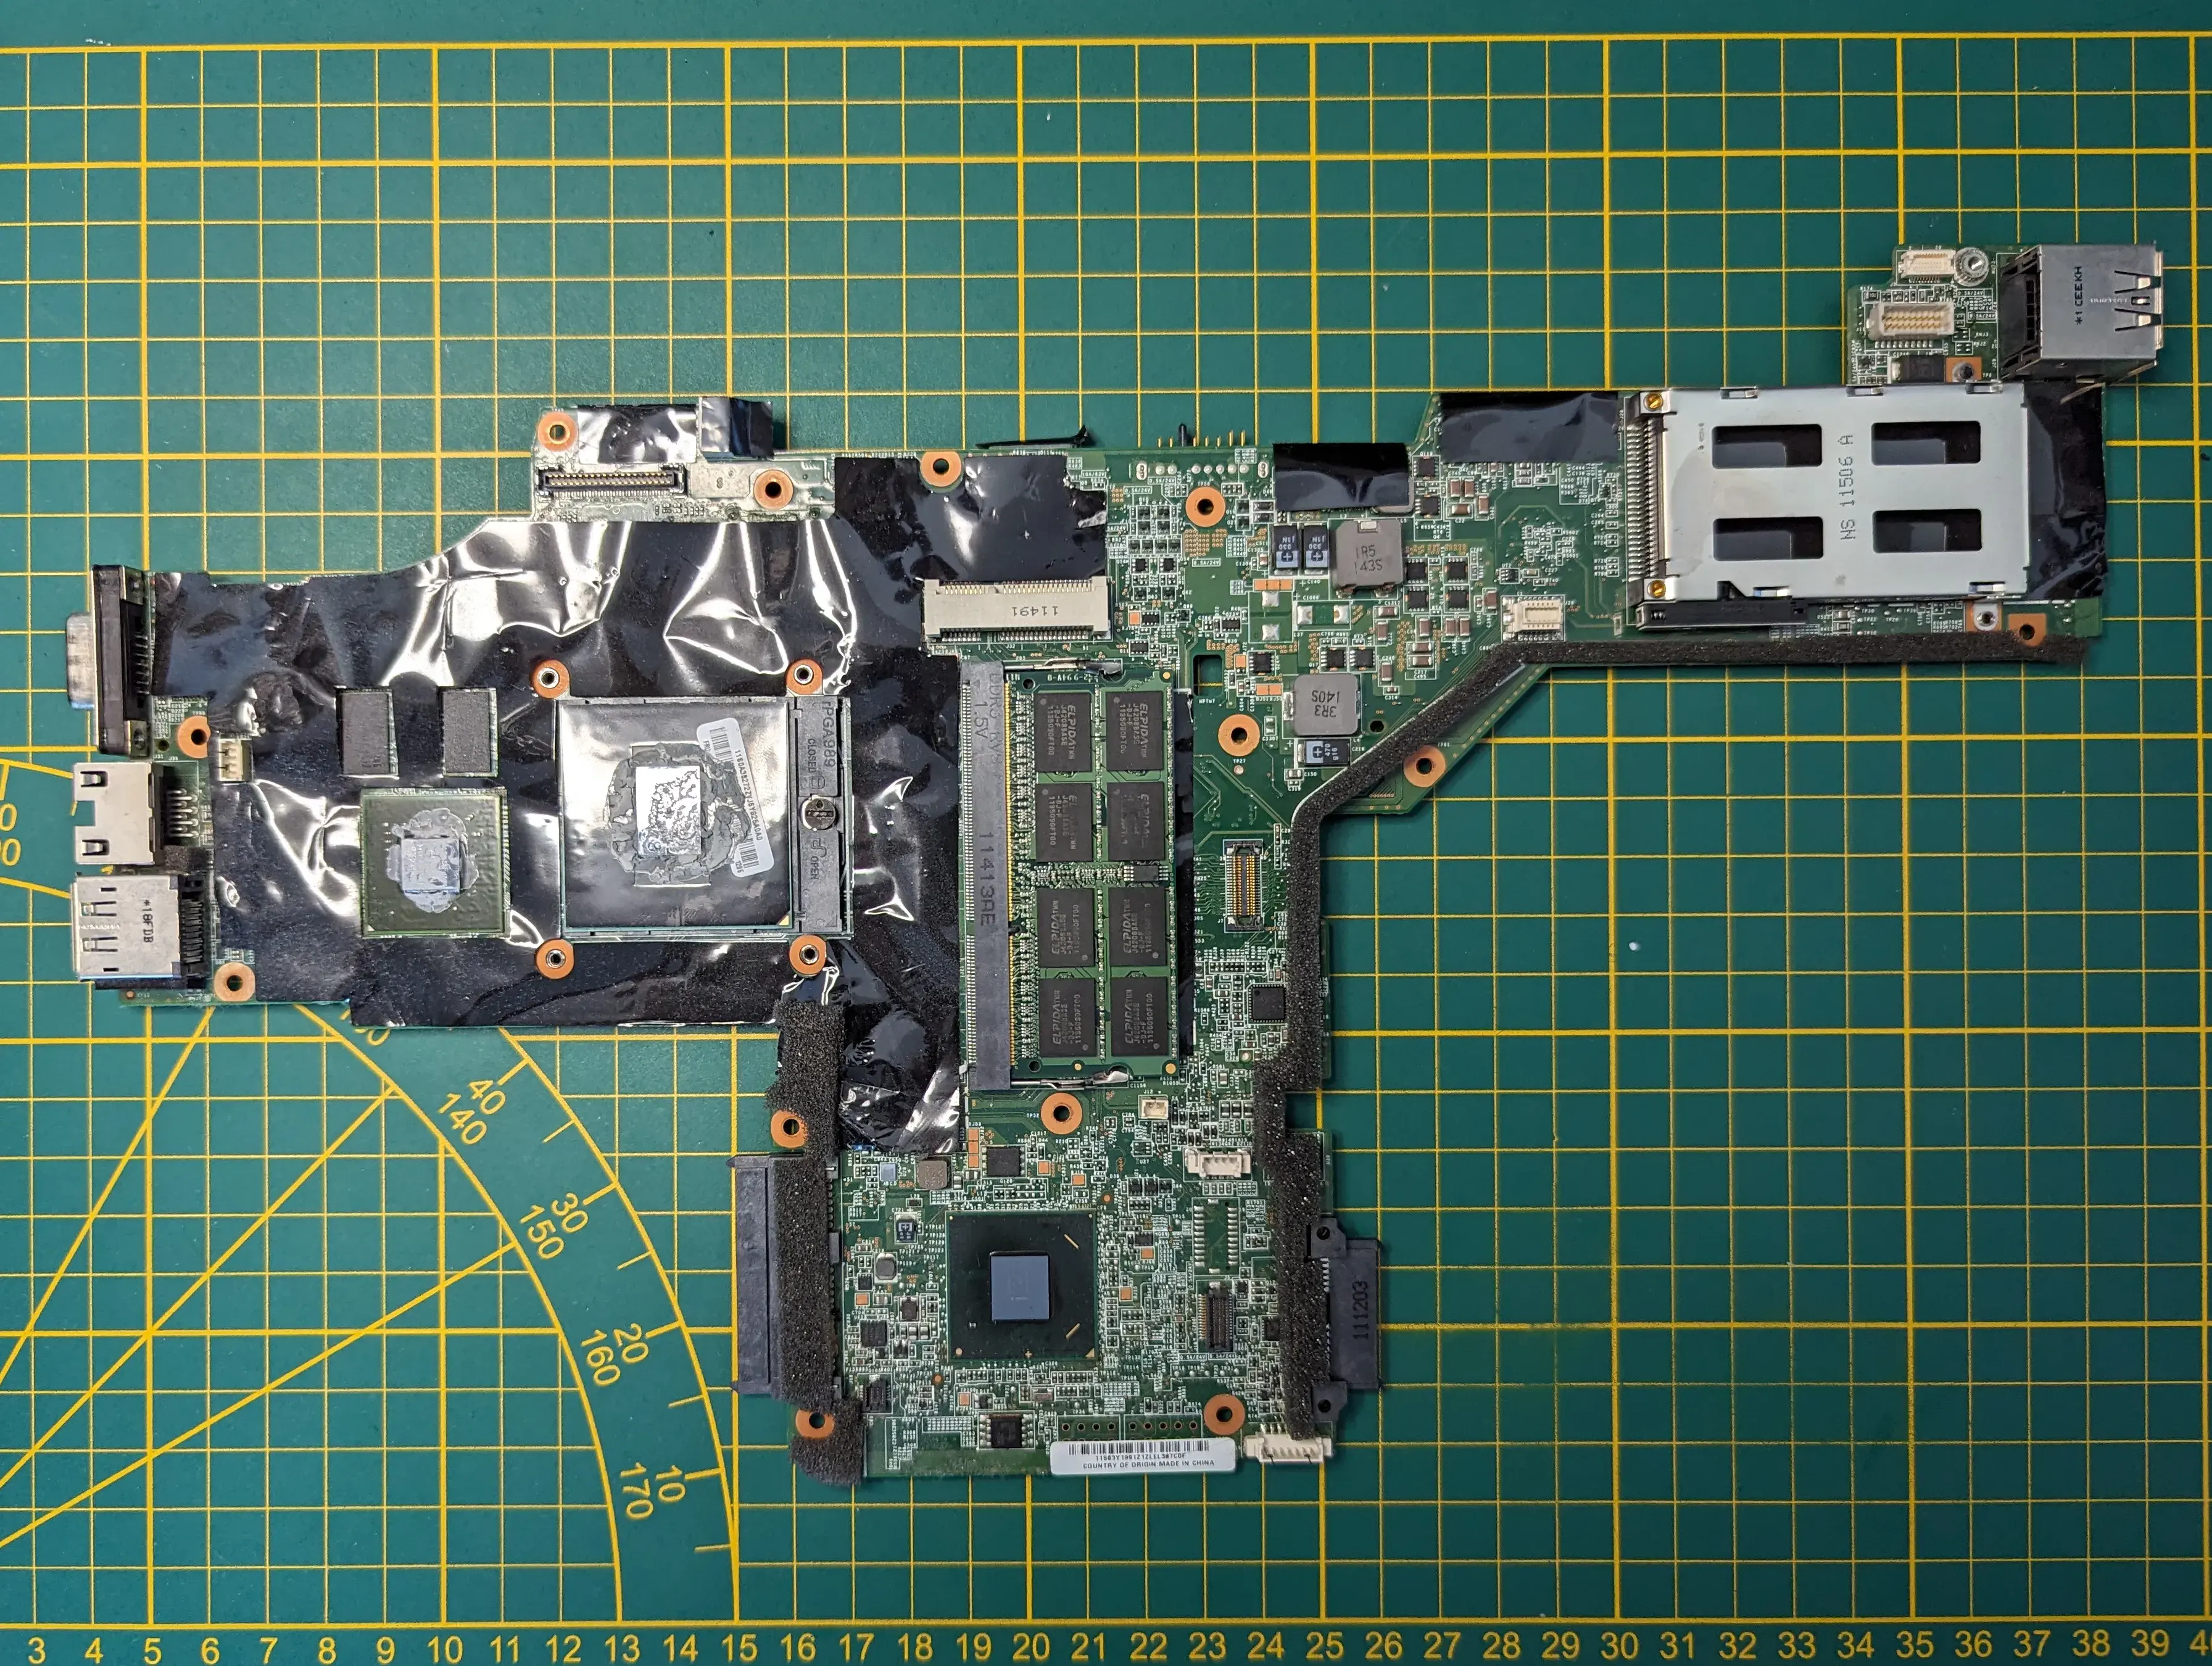
makeAccessing the BIOS chip
The BIOS chip is located beneath the magnesium frame, which needs to be disassembled to access it.
Note! In theory, the frame doesn’t need to be removed. There are through-hole test points that can be accessed from the back of the motherboard. However, I have not tested this approach, so your mileage may vary.
Refer to the “T420 Hardware Maintenance Manual” and follow the steps described in “FRU: 1200 Magnesium structure frame”.
Dumping the stock BIOS
My laptop came with an MX25L6406E chip, and I used the CH341A flasher.
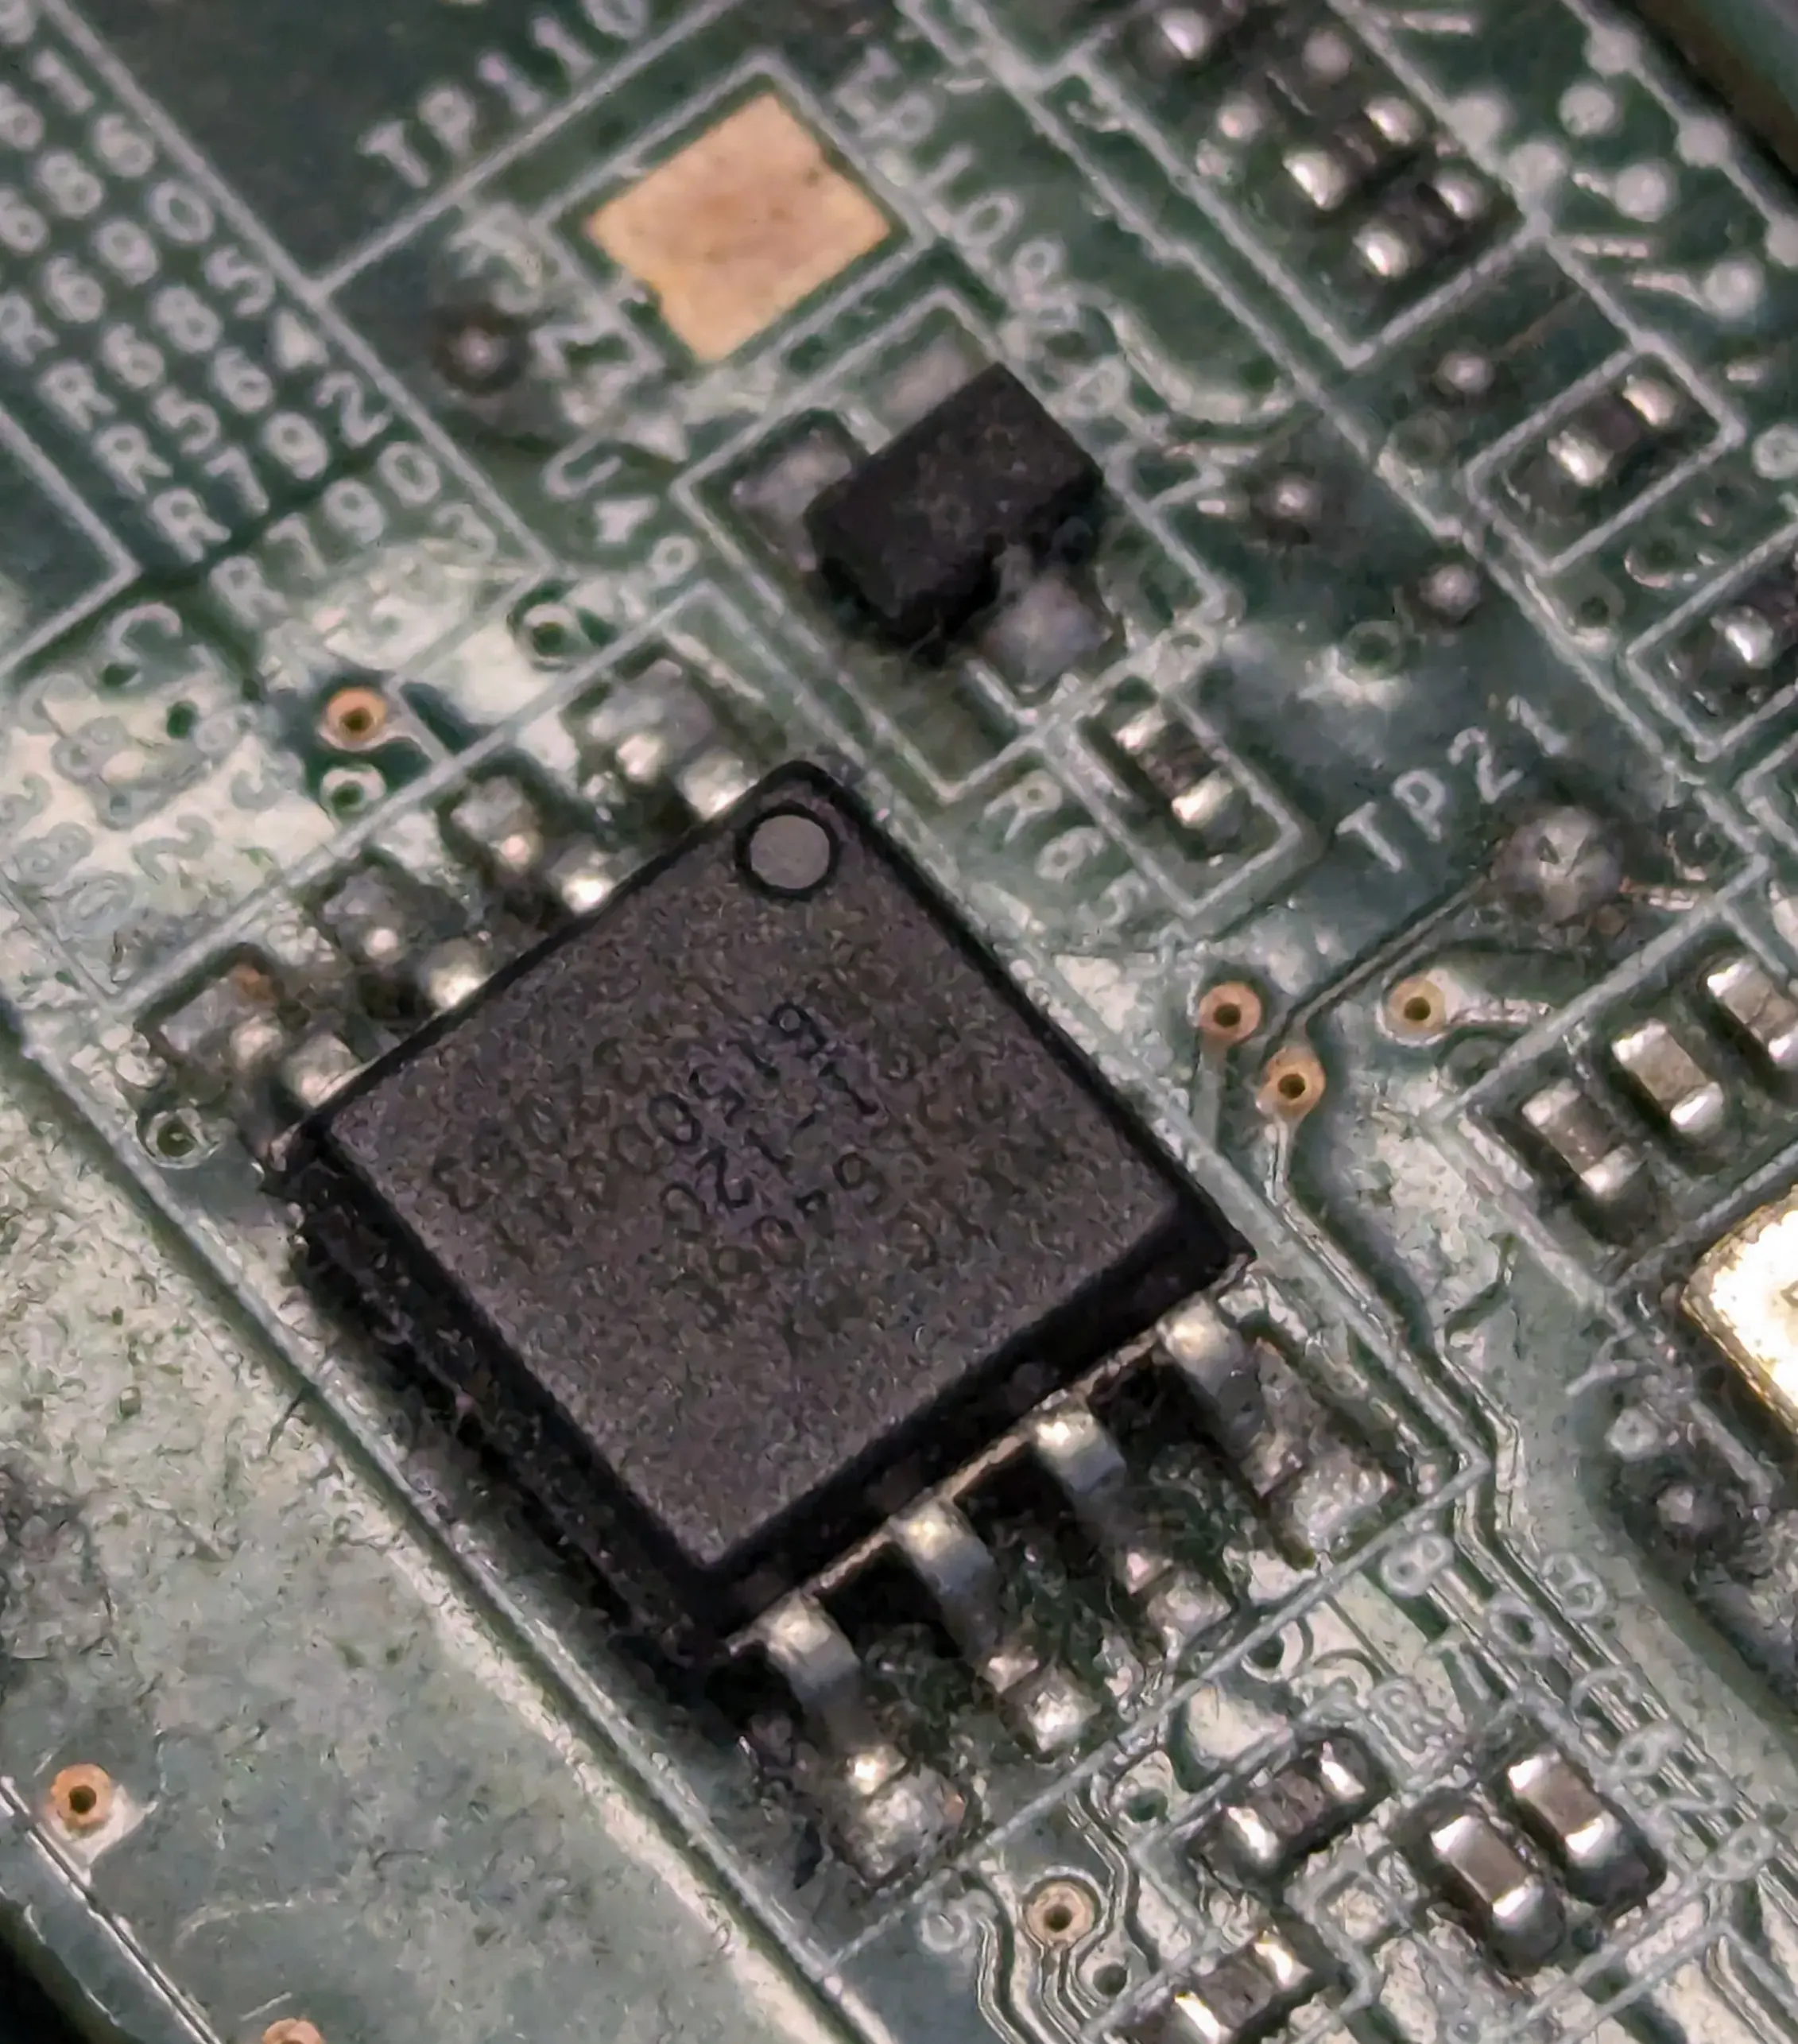
Note! Some models of the CH341A flasher have a hardware bug that causes the SPI data lines to output 5 volts. THIS WILL DESTROY THE CHIP. Before connecting anything, please verify the output levels and use level shifters or a 3.3V mod if necessary.
Connect the flasher to the chip using a SOP8 clip or solder wires for easier access later.
Using your preferred flashing utility, dump the factory BIOS. I will be using
flashromfor these steps:
flashrom -p ch341a_spi -c MX25L6406E/MX25L6408E -r t420_stock.binRepeat this process at least twice, and compare the output files (using diff or md5sum) to verify
whether the dump was successful. Make sure to backup original binaries!
I’ve renamed the binary that I will be working on to t420_mod.bin.
Disabling Intel ME
At this point you could opt to use ME Cleaner to partially disable the Intel Management Engine:
python me_cleaner.py -S t420_mod.binThis step is not necessary and can be skipped, but having less proprietary software running at the lowest privilege ring is always better ;)
Extracting ROM sections
Using the ifdtool built in an earlier step, extract the binary blobs from the BIOS:
./utils/ifdtool/ifdtool -x t420_mod.binThis will output 4 files, remove the BIOS blob, and move the remaining files to the previously created folder:
rm flashregion_1_bios.bin
mv flashregion_0_flashdescriptor.bin descriptor.bin
mv flashregion_2_gbe.bin gbe.bin
mv flashregion_3_me.bin me.bin
mv *.bin ./3rdparty/blobs/mainboard/lenovo/t420/
Preparing VGA BIOS
This step is optional; some payloads will work just fine with corebootfb or
even in text mode, but SeaBIOS requires it.
There are ways to dump it. If you are interested, this guide by Nenad Stoisavljević explains the process of extracting it from the stock BIOS (see the VGA BIOS Extraction section).
If you’d rather skip the extraction process, the blob can be downloaded from here.
Configuring and building Coreboot
Prepare the toolchain:
make crossgcc-i386 CPUS=$(nproc)After that’s completed run:
make nconfigThis will bring up the ncurses-based configuration interface:
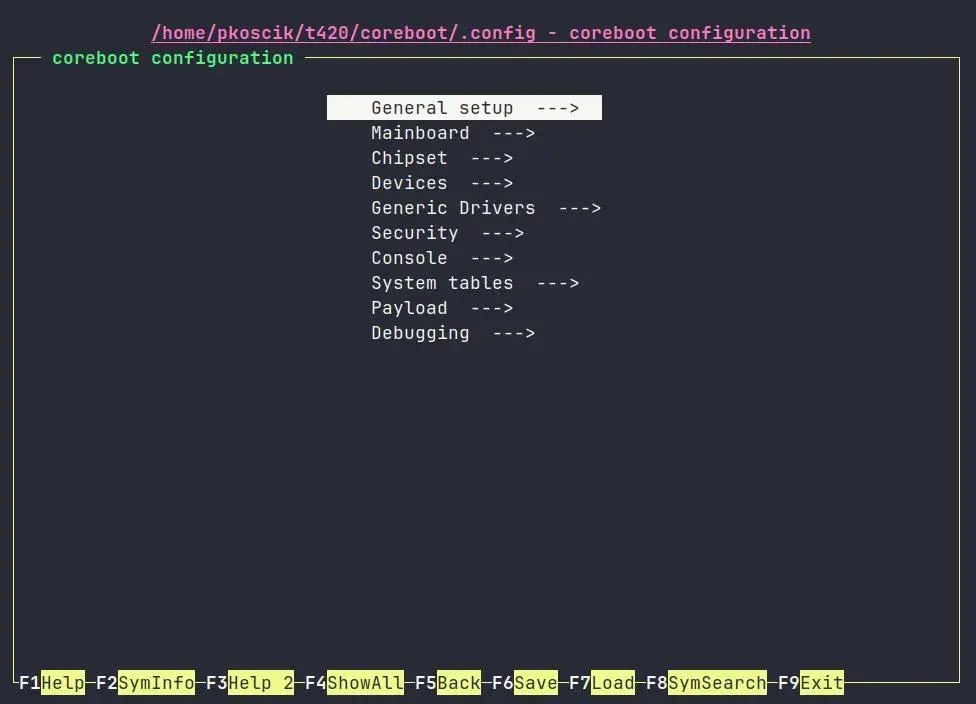
Note! The names and locations of configuration options in the tree might change. The configuration used in this example is based on Coreboot revision
a8fdafa. Also, please note that this is not a comprehensive list! I’ve omitted the values that were set by the T420 defconfig. So if something is enabled by default but you don’t see this option on this list, do not disable it unless you know what you are doing. ;)
General setup:
  [*] Include the coreboot .config file into the ROM image (not necessary)
  [*] Allow use of binary-only repository

Mainboard:
  Mainboard vendor (Lenovo)
  Mainboard model (ThinkPad T420)

Chipset:
  *** CPU ***
  [*] Enable VMX for virtualization
  [*] Set IA32_FEATURE_CONTROL lock bit
  [*] Lock the AES-NI enablement state

  *** Southbridge ***
  [*] Lock down chipset in coreboot

  *** Embedded Controllers ***
  [*] Beep on fatal error
  [*] Flash LEDs on fatal error

  *** Intel Firmware ***
  [*] Add Intel descriptor.bin file
    [*] Add Intel ME/TXE firmware
    [*] Verify the integrity of the supplied ME/TXE firmware
  [*] Add gigabit ethernet configuration

Devices:
  [*] Enable PCIe Clock Power Management
  [*] Enable PCIe ASPM L1 SubState
  [*] Add a VGA BIOS image (provide full path to the vbios file)

Generic Drivers:
  [*] PS/2 keyboard init

Payload:
  Payload to add (SeaBIOS)
Feel free to play with the Payload section! Adding coreinfo and
Memtest86+ as secondary payloads might be useful.
Note! I haven’t experimented with any other payloads yet, but booting directly into a bare-metal
elfexecutable sounds pretty interesting and is definitely something I will play with soon ;)
Once you have finished, press F6 and then Enter to save your changes. Finally, press F9 to exit.
Build Coreboot using:
make CPUS=$(nproc)Once the build process is complete, the binary will be located at ./build/ coreboot.rom.
Before flashing it to the chip, unlock the flash descriptor so that you
will be able to flash the entire chip from the operating system without using
external programmers.
./utils/ifdtool/ifdtool -u ./build/coreboot.romFlashing Coreboot
Just like when dumping stock ROM, recconect the flasher to the chip, and execute:
flashrom -p ch341a_spi -c MX25L6406E/MX25L6408E -w ./build/coreboot.romThe write process will take longer than the read process. After the flash is complete, disconnect the programmer and reassemble the T420.
If you chose the SeaBIOS payload, you should be greeted with this output:
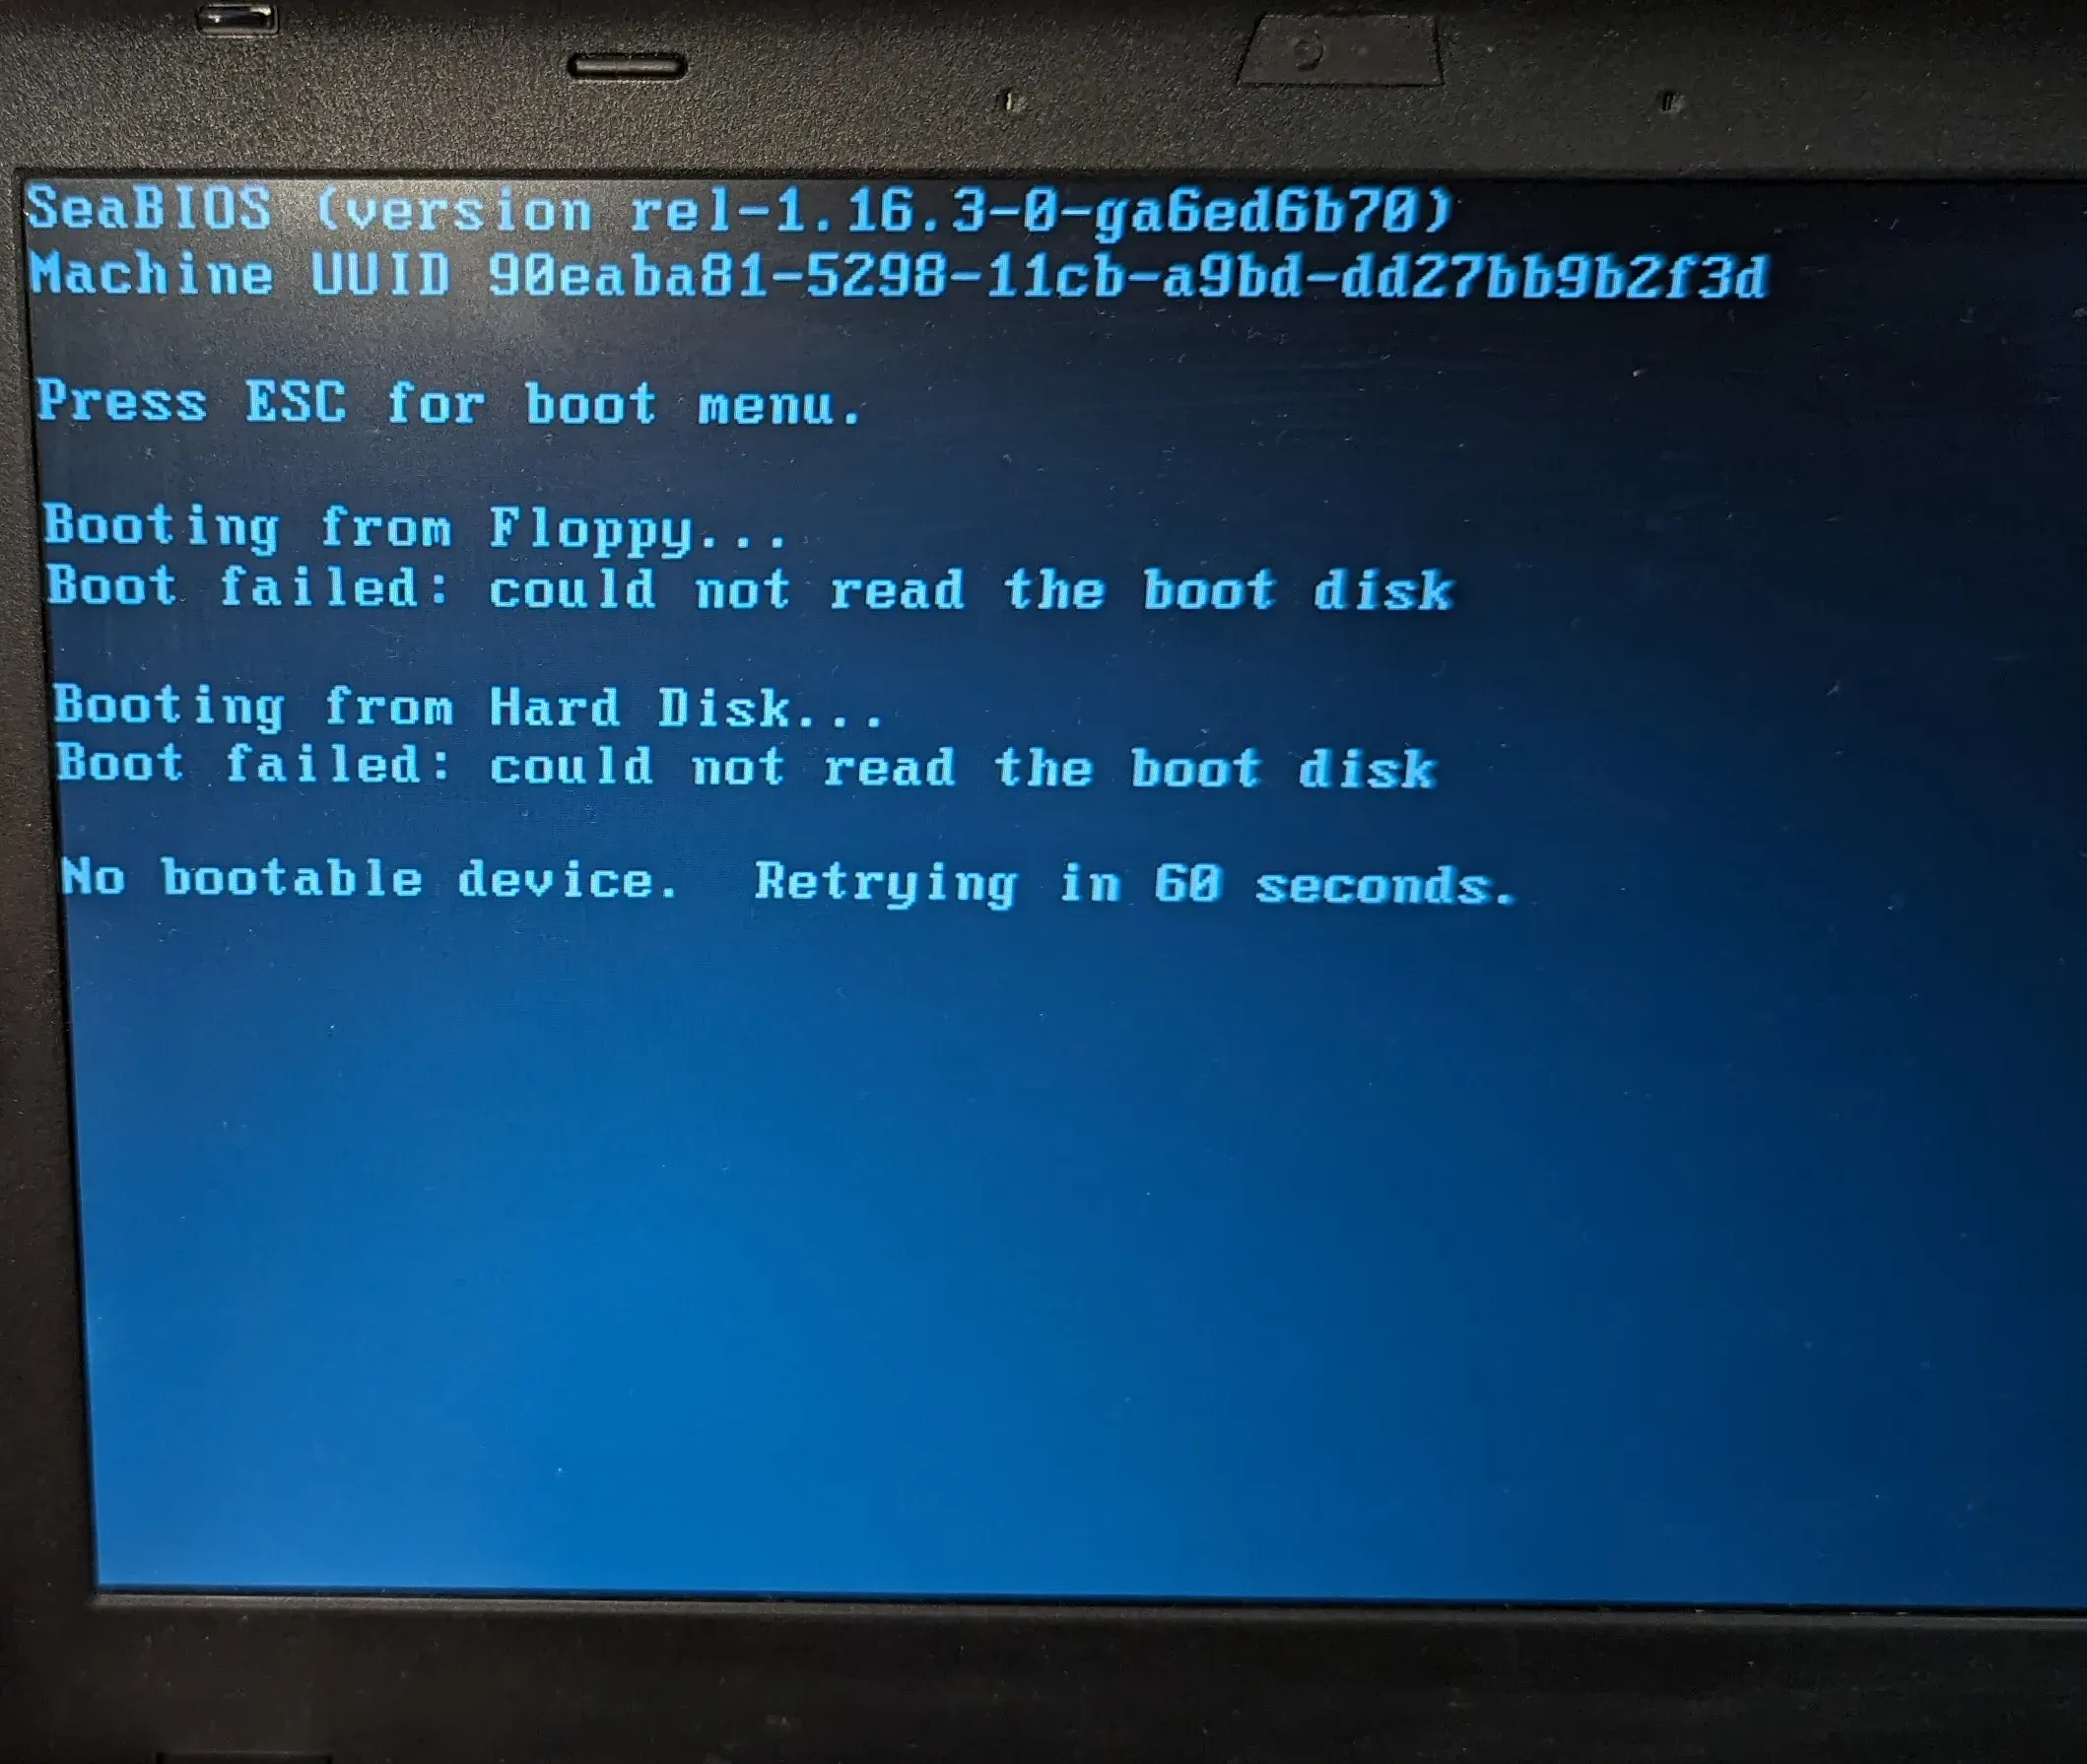
That’s it! You can now enjoy your FOSS-ed ThinkPad.
Links
- Coreboot website
- T420 Hardware Maintenance Manual
- MX25L6406E datasheet
- Other guides
- T420 coreboot installation guide, 0% guaranteed by
florstat - Lenovo T420 Coreboot W/Raspberry Pi by
jkaye99 - Flashing Coreboot on the ThinkPad X220 by
Nenad Stoisavljević
- T420 coreboot installation guide, 0% guaranteed by